Memory usage is getting higher, and my patience waiting on a browser to load changes is getting much lower these days. Installing Ruby Enterprise Edition and Passenger Phusion will help with both! Here’s how we’ll do it:
- Download Ruby Enterprise Edition
- Install Ruby Enterprise Edition
- Install Passenger Phusion (mod_rails)
- Install the Passenger Preference Pane
- Restart Apache
- Install Missing Gems
Ruby Enterprise Edition (REE) has the benefits of a stable 1.8.6 Ruby with the Memory recycling patches of Ruby 1.9.x. Why not just run 1.9.x you say? Well, it’s not compatible with a shitload of gems, including Rails prior to 2.3.
Please Note: For this tutorial I am referencing REE version 1.8.6-20090201. The commands must change to reference the correct version numbers as newer versions are released.
Download Ruby Enterprise Edition
Go to http://www.rubyenterpriseedition.com/download.html and download the latest version of Ruby Enterprise edition. There are two ways to do this:
- Save the file to your downloads directory using your browser, or
- Go command line in Terminal.
cd ~/Downloads/
wget http://rubyforge.org/frs/download.php/51100/ruby-enterprise-1.8.6-20090201.tar.gz
tar xzvf ruby-enterprise-1.8.6-20090201.tar.gz
You can grab the download link for the wget line by right clicking on the link on the download page and copying the link location.
Install Ruby Enterprise Edition
Now that we’ve downloaded the files, we need to install them. Open up a Terminal window and type the following.
cd ~/Downloads/
sudo ./ruby-enterprise-1.8.6-20090201/installer
Enter your password when prompted by the sudo command. Press Enter to continue when prompted by the install. Press enter again to choose the default directory.
It will now compile and install the Ruby Enterprise Edition, Passenger Phusion installer, Rake, Rails, Fast Thread, Rack, MySQL, SQLLite and Postgres libraries for your platform.
Note: It will fail out on the Postgres libraries if you don’t have them installed. That’s ok, just hit Enter and keep going.
Install Passenger Phusion (mod_rails)
At the end of installing REE it will give you a command to install Passenger Phusion. It will look something like this.

Now we need to run that command in the terminal as super user. Don’t forget the sudo!
sudo /opt/ruby-enterprise-1.8.6-20090201/bin/passenger-install-apache2-module
If prompted, enter your password for the sudo command.
Press Enter to continue when prompted. The installer will now compile and install the Passenger Phusion libraries. After they are installed, it will prompt you to add the following lines to your Apache configuration.

Select those three lines and copy to your clipboard. This is where I like to open a second Terminal window for safety as sometimes Command-C doesn’t work right.
sudo vi /etc/apache2/httpd.conf
If you aren’t comfortable with vi, you can alternatively do this with textmate.
sudo mate /etc/apache2/httpd.conf
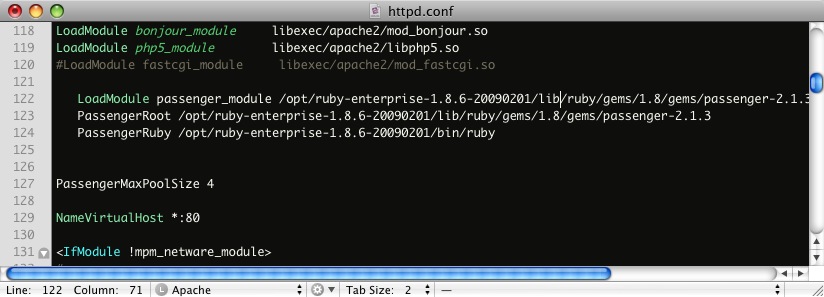
Go to line 121. This should put you right after the LoadModule directives.
Add the following 3 lines, making sure not to line break in the middle of the LoadModule directive.
LoadModule passenger_module /opt/ruby-enterprise-1.8.6-20090201/lib/ruby/gems/1.8/gems/passenger-2.1.3/ext/apache2/mod_passenger.so
PassengerRoot /opt/ruby-enterprise-1.8.6-20090201/lib/ruby/gems/1.8/gems/passenger-2.1.3
PassengerRuby /opt/ruby-enterprise-1.8.6-20090201/bin/ruby

You’ll need to uncomment the NameVirtualHost *:80 directive if it’s not already.
The PassengerMaxPoolSize 4 directive is a personal choice. I want my rails apps to spawn up to 4 ruby instances for any application. I have a very intensive AJAX app making API calls that requires the extra instances to move quickly. The default is 3 and will suffice for most situations, so you can leave out that line.
Bonus Tip: While you are there, enable PHP 5 so you can run web apps like phpmyadmin!
Save the file and exit back to the Terminal. You’ll need to restart Apache.
sudo apachectl restart
Enter your password if prompted by sudo.
Install the Passenger Preference Pane
Here’s where we’re going to make developing Rails apps much quicker. Go to download the Passenger Pref Pane application and save it to your Downloads folder.
cd ~/Downloads
wget http://www.fngtps.com/files/2/2008/12/PassengerPane-1.2.tgz
tar xzvf PassengerPane-1.2.tgz
open PassengerPane-1.2/Passenger.prefPane/
This will then install the preference pane in System Preferences. Make sure to authorize the install with your password.

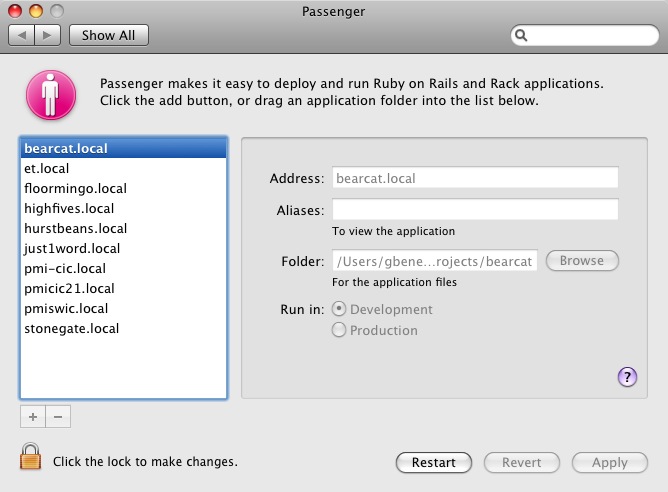
Now we need to setup your Rails or Rack based apps.
- Click the lock on the bottom left to make changes. Enter your password to authorize it.
- Click the + button to add new rails projects to your computer. Be sure to select the Rails root directory, not the public directory.
- Apply the changes.
Quick Tip: You can drag and drop the folder you want to host.
The last step you’ll need to do is restart Apache. While you can click the restart button, it rarely, if ever works for me. Let’s go back to the Terminal.
sudo apachectl restart
Easy Development
The beauty of the preference pane is that it automatically handles domain name resolution for you with no port 3000 crap. Just open your browser and point it at the address you specified in the pref pane, such as http://projectname.local/.
If you are running Rails in development mode, it will automatically pick up on changes in your code. Every once in a while you’ll need to cycle Apache to pick up new Models, but it’s quite good
sudo apachectl restart
Enjoy developing!
Wait, it’s missing gems!
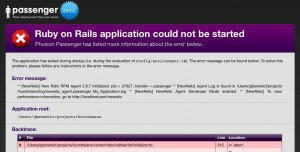
If you tried to run your app and you’re getting the Big Purple Error, you’ll probably need to install the missing gems.

Here’s how to install them under Ruby Enterprise edition. You’ll need to reference the new path to Ruby Gems for REE.
sudo /opt/ruby-enterprise-1.8.6-20090201/bin/gem install rails -v=1.2.6
If you have been using gem.config to make life easy, then you can do this in terminal from your Rails root directory.
sudo /opt/ruby-enterprise-1.8.6-20090201/bin/rake gems:install
Update: Alias Those Commands for Ease of Use
Running /opt/ruby-enterprise-1.8.6-20090201/bin/rake every time I needed to call rake (or ruby or gem for that matter) was getting to be a pain. So, I created some command line aliases to make it easier.
Add the following to the end of your ~/.bash_profile
# Ruby Enterprise Edition
alias rakeEE=”/opt/ruby-enterprise-1.8.6-20090201/bin/rake”
alias gemEE=”/opt/ruby-enterprise-1.8.6-20090201/bin/gem”
alias rubyEE=”/opt/ruby-enterprise-1.8.6-20090201/bin/ruby”
alias irbEE=”/opt/ruby-enterprise-1.8.6-20090201/bin/irb”
You can now call the Enterprise Edition versions of the most popular commands as such.
rakeEE db:migrate
Thanks for the concise tutorial – it’s always nice to see it all packaged together coherently. One thing I was wondering though would it make more sense to change PATH variables and use the enterprise ruby install for your system ruby?
I actually want both versions, with the default left in place. I prefer to run the app I’m working on using the version we use in production.
I’ve updated the post to include alias commands that make it easy to do. That path issue was a huge pain!
Instead of aliasing the EE binaries why not mv the old ones out of the way:
sudo mv /usr/bin/ruby /usr/bin/ruby.old
sudo ln -s /opt/ruby-enterprise-1.8.6-20090201/bin/ruby /usr/bin/ruby
#repeat for rake, gem and irb
How about this instead of all those hard-to maintain aliases:
# sudo -i
# echo ‘export PATH=/opt/ruby-enterprise-/bin:$PATH’ >> /etc/profile
# logout
# source /etc/profile
# ruby –version